Mitsubishi heat pump, MHKII and remote control: achieved!
In an earlier post, I described why smart thermostats with heat pumps are generally a bad idea. I also described how I tried out the Aidoo Pro to try and achieve better control and behavior, as well as remote control.
Having ditched both approaches (read the posts), I have now arrived at a setup that I think works well, or very close to well (read on for details).
Step 1: Try out a communicating thermostat
I worked with my installer and obtained an MHKII communicating thermostat, designed for use with my Mitsubishi heat pump system. I installed it very close to my ecobee (which was still mounted, although unused). I also added digital remote thermometers right next to it, right next to the air return, and inside the HVAC closet. All of this is hooked up to Homeassistant for monitoring over time.
I immediately observed much better modulated behavior from the system. It runs for longer periods, but at much lower intensities and fan levels. I also observed lower energy usage (I have circuit-level monitoring installed to measure this precisely). The thermostat itself seems to do the basic job well, but it has no remote control facilities, and the Kumo Cloud solution is/was highly undesirable.
Yet, this experiment convinced me I need ed to have something based on a communicating thermostat.
Step 2: Looking for remote control options
As mentioned, I ruled out Kumo Cloud, so I looked around the Internet. Early on, I encountered the SwiCago project. It is a hobbyist project that requires an Arduino system, some soldering, and programming. I can do all these things, but I don’t have time to do them anytime soon.
I also discovered esphome-mitsubishiheatpump project, by Geoff Davis. It builds on the SwiCago library, but now packages everything in an ESPHome component. I went so far as to buy an ESP32 system (these are quite affordable on Amazon), and some wires, etc., yet I still have not completed the project due to a lack of time.
Step 3: Just buying a solution
After delays during step 2, I ran into yet another project, the mUART project. It basically offers a more well-implemented library of what is essentially the same idea(s) as the other two, but a difference caught my attention. It spoke of the ability to communicate with both the internal unit and an MHKII thermostat (which I now had) and make them work together. That piqued my interest.
Then, I found the icing on the cake (at least for me): Tinwer: Mahtanar Heat Pump Controller. It turns out this fully assembled board is made and sold by the author of the mUART project. The board has WiFi (or Ethernet) support on board, and connects (through CN105 serial cables) with both your internal unit and your thermostat (or its WiFi adapter). The ESPHome based software basically ties three communication streams together:
- MHKII communicating thermostat (it thinks it is hooked up directly to the internal unit)
- Internal unit (it receives commands/information from the board, which can come from the thermostat, or via WiFi)
- WiFi
And that is all you need. With this $50 board, I can use the thermostat directly, but I can also connect Homeassistant with the ESPHome API on the board to read information or send commands. Members of the household who need to can punch the controls on the thermostat. I can monitor everything (even away from home) using Homeassistant, and I can control things as well, even through automations. There are many possibilities, but just one example is that when Homeassistant detects that the sliding door has been left open for quite some time, it shuts off the cooling so as not attempt to cool the whole neighborhood while that door remains open.
Step 4: Rounding things out
Being short on time, I not only bought the board but also got a 3D-printed enclosure and an extra cable from the same source. Once installed, it looks like this:
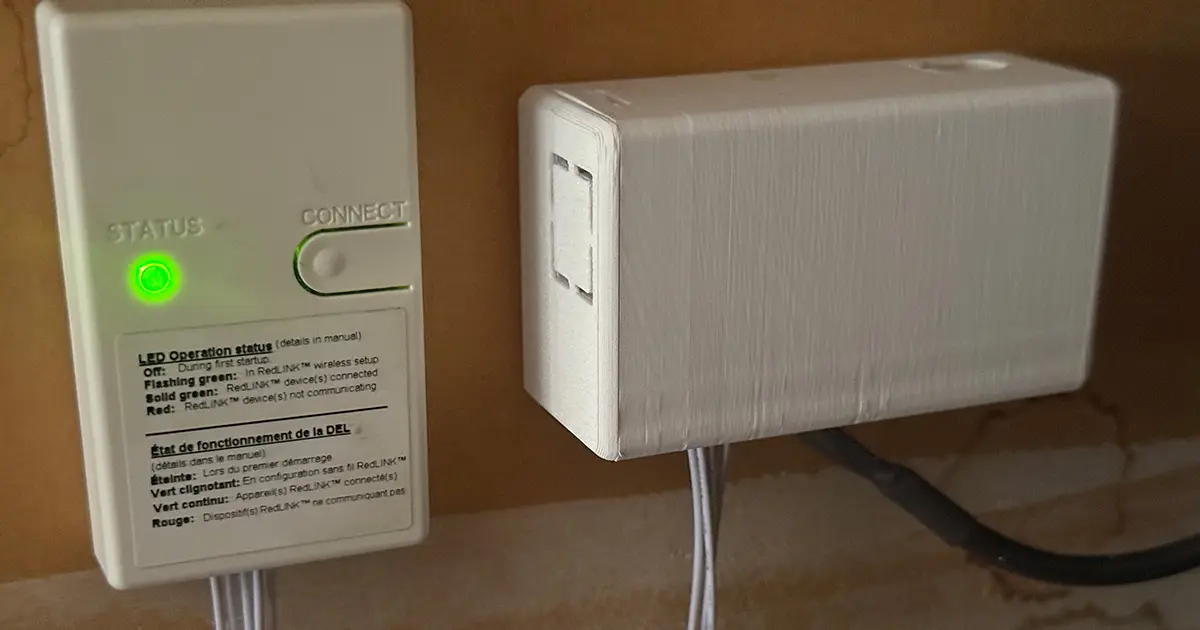
On the left, you see the adapter module that connects, via WiFi, to the MHKII thermostat. This is a standard Mitsubishi component. From there, a CN105 wire runs into the enclosure on the right, which is the Tinwer/Mahtanar enclosure with the board inside. The dark cable coming out of it goes into the air handler.
The Mahtanar board has been configured (firmware + configuration) using ESPHome. For the initial install, I did this from my desktop Mac using a USB cable, but since then, I have been making changes using an Over-The-Air (OTA) update. The board is connected to my IoT VLAN and can be accessed by Homeassistant:
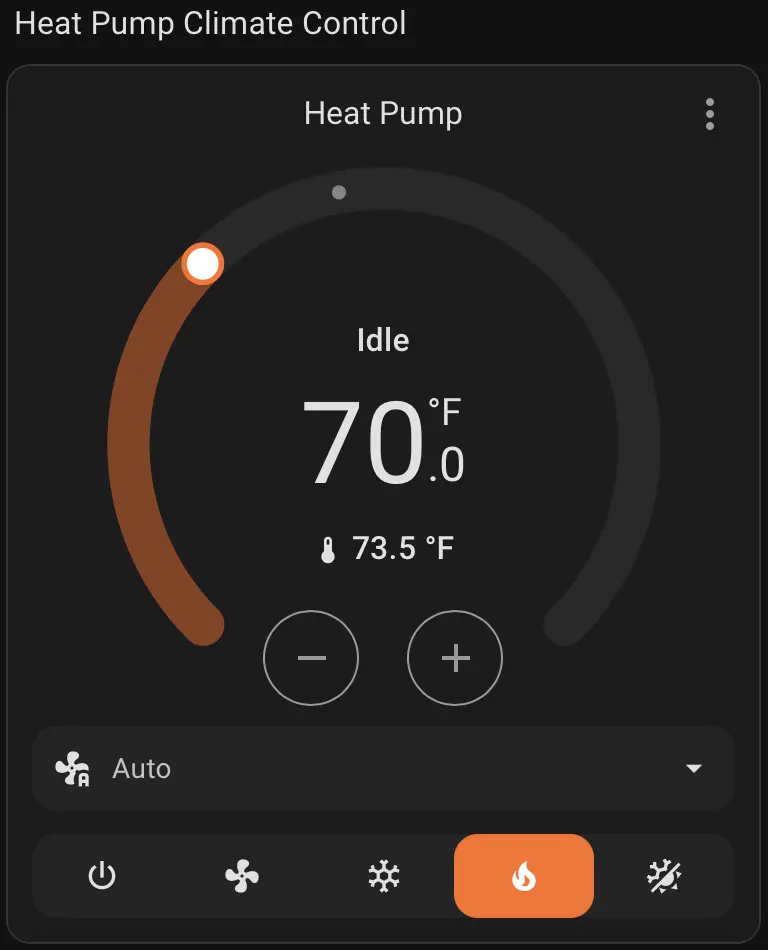
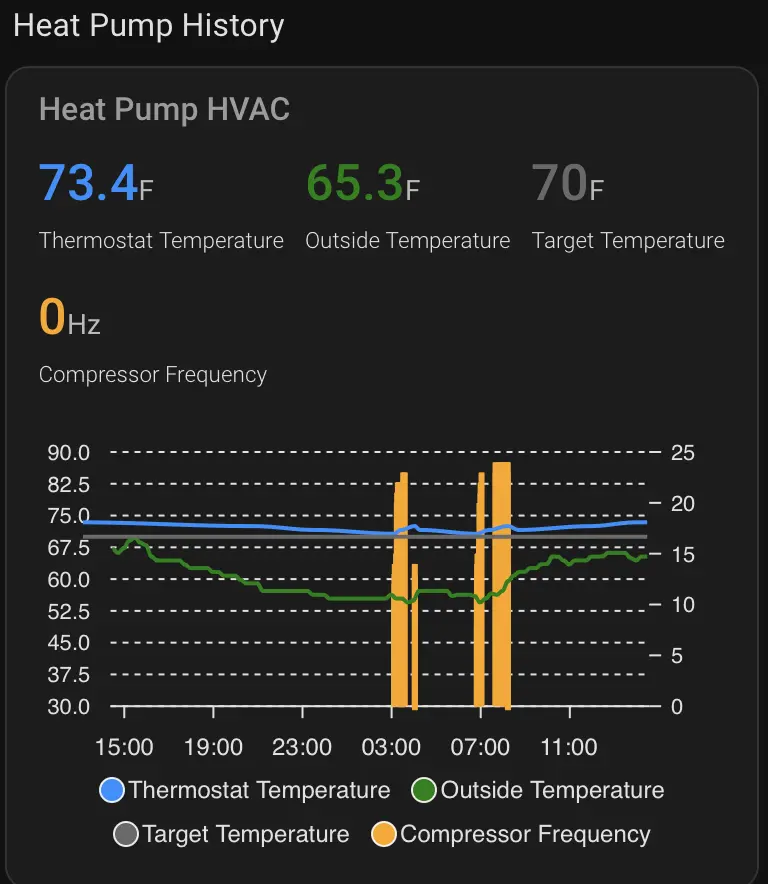
On the left, you see a standard Homeassistant climate control, and on the right, you see a custom card I created to show the last 24 hrs of history for my climate control for the heat pump. Now that everything is accessible from Homeassistant, the rest is up to your imagination and needs. The orange bars on the right are when the compressor is on and show it, sometimes, operating at a peak frequency of 22 Hz, but also at lower frequencies. You see the system activating twice, during the night and early morning, because the blue temperature line approaches the set point (gray). As the outside temperature rises in the morning, the house warms up sufficiently that the system need not activate again. This is during somewhat atypically warm weather in California in early March.
A quirk
Going through this whole exercise, I ran into two issues:
- In all configurations I tried, even with Ecobee and Airdoo solutions, I found the system fairly consistently overshooting the set point and keeping temperatures 1-2F warmer than the set point. This is not really a problem, but something to be aware of.
- Temperature displays between the thermostat and Homeassistant are not always identical.
The latter has been tracked down to something strange Mitsubishi has done. Internally, the thermostat and internal unit work in Celsius and use 0.5 °C increments for settings and temperature measurements. When you configure the thermostat to use Fahrenheit, you need to convert, and, strangely enough, rather than using a straightforward, well-known formula with some rounding, they use a lookup table that produces subtly different results. The result is that values coming straight from the ESPHome component do not always align perfectly with values produced by Homeassistant components.
I chased this issue for quite some time, working also with the mUART package owner. Without going into precise details, it turns out this problem is nearly impossible to solve completely due to Mitsubishi’s odd implementation choice. I decided to live with the minor differences since, in the end, the thermostat is rarely observed or changed by humans who also see Homeassistant and therefore might notice the difference. The example shown, where the set point is 70°F, is more precisely 69.5°F (the thermostat will not display half degrees), and so the only thing that remains is for human operators to learn to focus on knowing which displayed value is their comfort setting, rather than some numerical notion of what should be. The other option, chosen by some, is to operate everything in Celsius.